
Ralph Pink Sahara Shirt

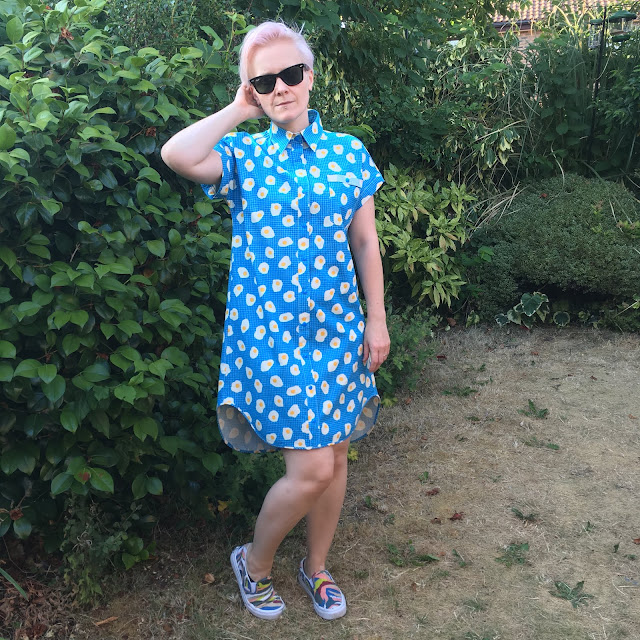
Firstly, let me say that I cannot tell you how pleased I am with this make! Oversized shirts are one of my wardrobe staples (and one of the main reasons I got into sewing my own clothes!) When I saw the Ralph Pink Sahara pattern (and The Magnificent Thread's versions of it on her blog) I knew I had to have a go at making it and the end result has way surpassed how I thought it would turn out!
 |
| To illustrate just how oversized this shirt is here's a pic of me looking theatrical! |
Firstly,
the pattern is a pdf so it took a lot of patient cutting and sellotaping to
piece the pattern together. As it was so many pieces to print, I decided to
follow the instructions onscreen (I finally gave in and printed the last two
pages to figure out the collar). I pre-washed and cut my fabric a while ago
(something I often do when I am tired but want to do something sewing related)
and then put them away for sewing after completing my other projects. I knew
that I would need some time to concentrate on this one and didn't want to rush
it, so I did an hour or so over a couple of evenings and then completed it on a
free Sunday afternoon.

The fabric is a gorgeous Atelier Brunette cotton gauze in terrazzo night from Sew Me Sunshine. It's really lovely to sew with and is perfect for this type of pattern as it is light and hangs well so doesn't appear or feel too bulky, despite there being a lot of fabric. The sleeves were super easy as all you had to add were these cuffs (above), which have a lovely little split feature on them.

The button placket felt a little weird to sew as I'm used to sewing plackets the opposite way around. This one is sewn to the inside of the garment and then turned up and over to the front (if that makes sense!) so you topstitch the placket to keep it in place. I think my topstitching skills are improving so my stitching doesn't look too wonky on this one! I also went with snaps rather than buttons for this make mainly because a) I have a tub full of snaps ready to use b) I find them quicker than buttons/button holes to add (although I did have to remove a few with a kitchen knife as I was a bit off!) and c) I asked my fellow sewists on Instagram and snaps seemed to be the popular choice.


The collar was pretty straightforward to sew and similar to others although, again, I think it was attached back to front (from my usual method), as I topstitched the lower half (the stand?!) to the outside of the shirt, rather than the inside. It also has a nice topstitched feature around the edge of the collar. This is the first time I used my Merchant and Mills bamboo point turner (also from Sew Me Sunshine), which I was thankful for as I think my usual pencil technique might have gone through the gauze!
 |
| The rolled hem |

I usually hate hemming things (I tend to rush it - don't judge me!) but this pattern asked for me to roll the hem and somehow it just made sense, the fabric behaved and I managed to stitch it first time without a problem! It looks pretty even.
Overall verdict: I will definitely be making this pattern again. It uses a lot of fabric (but was still cheaper than most of my RTW oversized shirts) but it is worth it for the style I love!
D.
Comments
Post a Comment